Monday, December 29, 2008
Photo follow up
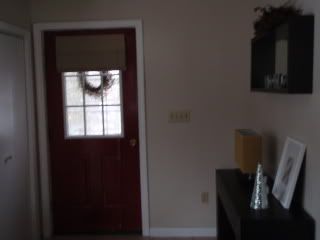
Here is our freshly painted red door, white trim, and the new window treatment (taupe Roman shade):
(Note to self: Replace all switchplates and outlet covers with stainless ones. Yeek.)
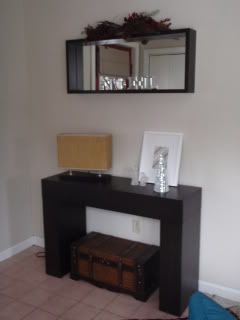
Here is the front entry way console table and mirror.
(Yes, the peachy-pink tile is on our list... Our long, ever-growing List-with-a-capital-L.)
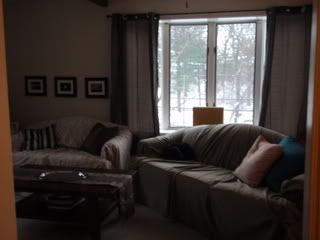
The bar-room holds the Christmas tree. Coincidence? Ask Tony how much I drank this holiday season. Nevermind, don't:
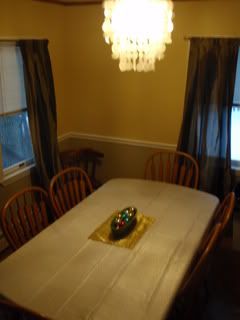
Dining room:
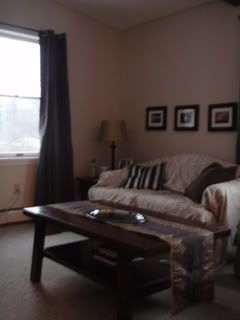
Front room:
The curtains in the bar and front room were recently purchased (Sarah) and put up (Tony). They make me feel all warm and cozy.
It may not look that different to those who have seen it before, but we put a lot of sweat and paint and detail work into the common areas so far. I'm happy and proud of us.
Although Santa didn't get me a super duper expensive camera, he did get me a ton of cute and practical accessories for the kitchen to go along with our new appliances. Once I get enough energy to unpack everything and pick up the clutter, I'll be sure to post more pics.
From both of us, I hope everyone had a great holiday!
One more party...
Christmas Eve went off without a hitch. We got everything on the list done. The house was in great shape for the party. We received many compliments that it has never looked so good. It's nice to hear that after putting all that work into getting it ready. I'm kinda glad we had a party on the horizon. That helped get my butt in gear for sure!
We're having a small gathering on New Years Eve. The usual crew plus a few from the south shore. There will be drinking and video gaming I'm sure. I may tell everyone to bring a hammer and we'll turn it into a demo party. Take a good look at the ceiling people, as it's the last you'll see of it!
The real party begins on January 1st. That's when we start tearing down the ceiling in the bar, dining room and kitchen. I'm going to take it down neatly, tile by tile, bagging it up as I go, keeping the mess to a minimun. Not sure how long that will last, but I'm sure it will take a while. While I work on that I'll line up the boys to order the lumber and we can make plans to get to ceiling/floor reframed. Once the details of the project are nailed down, I'll post them here. It will be something along the lines of:
Demo ceiling
Reframe
Hang celing
Lay floor
Celebrate xmas 2009
Thursday, December 18, 2008
The Calm Before the Storm
I purchased new curtains for the front room from Target. I'm bummed that they're not on the website so I can't post a photo. But I'm not totally convinced they'll work anyhow. They have to be better than what was up there previously... $12 goldish green sheers from Homegoods that had seen better days. Blech. And now with all the trim painted white up against our light taupe-gray walls, we needed something new. We'll see how it goes.
Hanging the curtains is on the list among a bunch of other things:
- touch up red door
- prime all remaining trim (kitchen, dining, bar)
- paint after priming
- hang new blinds in kitchen
- hang energy saving window panels over french doors
- SHOVEL, SHOVEL, SHOVEL
We're supposed to get snow tomorrow. The reports range from 4-6 inches, to EPIC OMG FREAK OUT kinda storm. Who knows.
Welcome to New England!
Tuesday, December 16, 2008
What I learned, Part 2
The delivery guys showed up on Monday around 8:15. I spent the time disconnecting the dishwasher and stove. We also packed up the fridge the night before. As they carried the old appliances out, I would vacuum up the area before they brought the new ones in. First to arrive was the stove. I was going to use the same old cord, but they put a new one on for me. Glad I didn’t buy one at Lowes! Next to arrive was the dishwasher. Oddly enough, they left it in the living room. They lugged out old beast of a fridge out and brought in the new stainless bottom mount. It’s a thing of beauty I tell you. Shelves that aren’t cracked. A door that closes. An ice maker. Lap of luxury I tell ya…Then they carried in the new over the range microwave. I asked them about the dishwasher installation and they said to call Lowes to set it up. No problem. I tipped them $30 and gave them each a bottle of water and they were done by 9:15.
Lowes was running a promo where any dishwasher over $397 came with a free installation. I figured the delivery guys wouldn’t install it, so I called to inquire. Well, even though we bought a $600 dishwasher, our “discount” brought it under the $397 mark. So it would be $169 to install it. After easily disconnecting the old dishwasher, I said “No gracias. Neely and I will do it.”
All the existing plumbing was there, I just needed to hook it up, riiiiiight? Not in this house! Ok, it wasn’t that bad. My first mistake was I left a piece I needed on the old dishwasher. It was a 90 degree elbow that attached the dishwasher to the copper tubing. So I went to Lowes to pick it up, along with a socket kit (stay tuned…). With the new elbow in hand I taped it up and attached it to the dishwasher. I hooked up all the electrical, and the drain. It took a little finagling to get the dishwasher moved into its new home, but I nestled (forced) it in. Now I just needed to connect the old copper tubing to the new elbow. I only had about 5 inches to work with. I tried to get it started by hand but it was too tight (that’s what she said?). So I am trying to crank it by hand. I could only crank about 1/16th a revolution each time and it would probably take 50 or so full revolutions to crank it down. Just when I would think I was making process the entire fitting would pop off and I’d have to start over. The old tubing was not working. I check the connection under the sink and headed down to the local hardware store (closer than Lowes). I bought a dishwasher kit to get the 60” flex tubing I needed. It also came with the elbow I previously bought. Oh well. I taped up the fittings again and attached the tubing. Easy as pie! Turned the power and water back on and ran a test to see if it leaked, and drumroll…..OF COURSE IT DID!
Over the course of the express cycle a tiny bit leaked from the hot water line into a Tupperware container. I backed it off, re-taped it, tightened it up and ran it again. Second try was a dry success.
Stove, done. Fridge, Done, Dishwasher, done!
On to the microwave. This thing is a beast. I had every intention of installing it myself. After calling Nick with a few questions, he suggesting I wait for him to come over before hanging it. So I prepped it as best I could. I installed a socket in the cabinet above. We tore out the tiles on the backsplash to make room. Nick measured for the 4 holes we needed to drill and I drilled them. We hung the bracket, then mounted the microwave to it. Two lags in the wall and two lags in the top cabinet and it was done!
So I learned how to install a dishwasher and over the range microwave. No to mention a socket and some plumbing tricks. All things considered it was a very productive day off work.
Here are our new appliances in our old kitchen!
What I learned this weekend - Part 1
Nearly 4 inches of rain was finding many ways into our basement. We have a drain built on the inside of the foundation where the water pools up, and gets pumped out. That’s on the “bedroom side” of the basement. The “kitchen side” has rarely had any water issues. This was an exception. Water was seeping through a crack the cellar floor and pooling up behind the kitchen wall. I checked on Thursday just before midnight and the pump was doing its job on the bedroom side, while the kitchen side was dry as a whistle. I set my alarm for 4:30, figuring I’d get up and check it. Something woke me up at 3:30 so I decided to check in on it. Good thing. The kitchen side had nearly an inch of standing water and it was flowing towards the bedroom side. I ran and grabbed some towels to dam it off then made a dash for the wet-dry vac. It was all the way upstairs, with “dry” still in it. I had to dump a bunch of dusty debris all over the non existent floor and barrel my way down to the cellar w/ the ginormous vacuum.
I called the tenants to warn them to get anything important off the floor, just in case. Then I started the cleanup. In case you didn’t know, water is known to follow the glorious path of least resistance. In this case the least resistance was just below a pipe that runs through our foundation. It had a constant stream of water coming in. It would puddle up around the ejector/septic tank that is used to pump the pee and poo from the apartment downstairs into the main sewer line. This little poop trap is what saved our butts! Since the water was building up around the tank, I used a hammer (when we finally found the hammer under the couch) and screw driver to blast some holes in the rim of the tank. This allowed the water to flow into the tank. When it got high enough, the pump would kick in and out the water would go! Holy resourcefulness Batman! So that got things under control.
So, what did I learn? I learned that an ejector tank can be used to pump out your basement.
I also learned that no matter how bad things are for you, they are worse for someone else. While I’m sitting in the basement, waiting for the water to pool up before vacuuming, I wrote my mom an email basically saying “we need to work this water issue out.” I got an email message from her hours later saying they had no power, so no heat, water. It happened late Thursday night, and it just came back on last night (Monday).
Sorry there are no pictures of this great incident! I'm sure we'll have plenty of "PROJECT FRENCH DRAIN" next srping.
Thursday, December 11, 2008
So Grown Up
We're almost done painting the trim a semi-gloss white, although the big challenge is figuring out how to paint the bay window that the cats love to sit on. We decided that we'll paint it when it's dark out, as the cats only seem to stare out the window during the day time. Let's hope that works, and we don't come home to find white paw prints all over our furniture and carpet. Although I do love a nice animal print...
As Tony mentioned briefly, we also bought ourselves all new kitchen appliances. I know, HUGE, right? Totally huge. Buying appliances sounds so adult too. We're such grown ups. We weren't exactly planning on taking the plunge this soon, especially with all this other work going on, not to mention the little economic FREAK OUT our country is facing... not sure if you've heard about it.
But one of Tony's many connections presented us with an opportunity we couldn't pass up. And we had to make a decision within a matter of days. Without naming names or going into too much detail (and no, they did not "fall off a truck"), we ended up paying just over $2k for these beauties, saving about $1300 including all rebates:
Stove:
Microwave (which will go above the stove, saving on precious counter space):
Dishwasher:
Fridge:
Okay, so the excitement doesn't quite translate to stock photos, but believe me... They are pretty. At least I hope so. They're to be delivered next Monday. EEE!! That's my excited sound.
Now that things are happening in the kitchen, that project may be pushed to #2 on the list up from #3. We were planning on tackling the downstairs bathroom after the current project is complete. But seeing those beautiful appliances up against the oak cabinets, laminate floor, and PINK countertops may just give us the nudge to move forward with some serious kitchen plans.
Fingers crossed we can get to it by 2010.
Tuesday, December 9, 2008
Controlled Chaos
So, where are we? This past weekend I got help from cousin John. I gotta say, having another set of hands around for the heavy lifting is a good thing. First we carried out the two huge piles of pine hardwood floor that I had ripped up a few nights earlier.
We brought it out to the driveway as I had a guy picking it up on Sunday morning. If you're ever looking to get rid of anything, just put it on Craigslist. Someone will take it. In this case, a non profit environmental protection agency was interested in the flooring to restore some offices. They took it away and gave me a receipt to use as a tax writeoff. Score!
After carrying the flooring down three flights of stairs, I cut out the subfloor. John would follow me and stack the wood and vacuum up all mess collecting on the ceiling below. This will go a long way when we tear that ceiling out.
We found some interesting things along the way. Here's a little rat poison.
It looks as though whatever rats did not eat the poison were big fans of the game Monopoly, as we found many game pieces in the floor. Get out of jail free? I'm hanging on to that one!We bagged the subfloor as my his father wanted it to burn. So we basically got rid of 400+ sq ft of waste, for nothing. No dumpster rental. No angry garbage men. Double score!
We cut the floor back just far enough to see where the floor joists sit on the supporting wall. The plan is to replace the 2x6 joists with 2x8. We can't do this until we're ready to tear up the ceiling below. I've given Sarah my word that we'll have ceilings for the holidays, so we're in a bit of a holding pattern right now.
Good news is there is enough floor left in Bedroom #2 for storage. So I lugged the 12 boxes of our new floor out of the dining room and into the bedroom. Sarah helped by making hand made Christmas cards. If you're reading this blog, you'll be getting one soon! She did offer encouraging words such as "Wow! That looks heavy!" When I took a breather on the steps she said something along the lines of "are you gonna make it?" I did!
On the plate right now:
Getting organized for the holiday
Getting ready for our new appliances! (WHAAAT!?! that will be the next entry)
Getting a time table set just after the hoilday for the rest of the upstairs project
and of course, continuing to control the chaos!
Thursday, December 4, 2008
Nobody said it was easy
In the midst of all the little Peach Orchard Projects lies a giant remodel of our upstairs bedrooms. As Sarah alluded to, what started out as laying wood floor in the two upstairs bedrooms has metamorphosed into a full on remodel.
The original plan called for us to change the layout of the bedrooms. No big deal. We (I) demolished the old closets, tore out the rugs, removed a non load bearing wall, and framed two new closets and a new wall.(thanks Nick and Paul). Our rooms were starting to take shape. We were off to a great start!
I hung the drywall on my own and decided to try tackling the joint compound job myself. After the first coat I had some serious doubts of my JC abilities. So I put an ad up on Craigslist and received 30+ responses in a few hours. Just goes to show how hard up some people are for work. Anyway, a couple sketchy dudes came over and banged out the job in two nights. I had them leave the closets unfinished as I could use them for practice. I also didn’t have them do the ceiling as it would have taken twice as long and cost twice as much. I figured I could match the texture, or at least get it close enough so nobody would notice. High hopes!
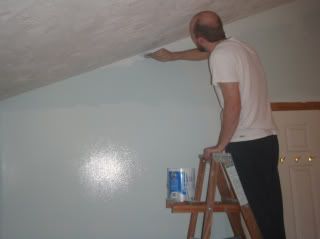
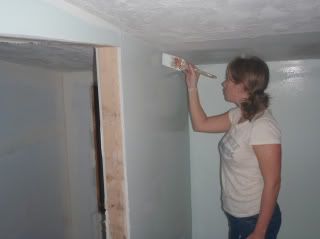
So, we now we have new walls, yay! Enter the painting. You can’t lay down the floor until everything is painted. Well, technically you can, but it’s silly. So prime and paint we did. There are some low ceilings making it real easy to paint in certain areas. Then there are some areas that are 12-14 ft which is still tough to reach with our step ladder. But I digress as we got it all done, it just takes time. Gotta give it tiiiime.
Ok, framing, walls, paint…we’re making progress!Now it’s on to that icky baseboard heat. We debated on replacing all of the heating fixtures. The only problem would be we’d have to drywall a 6-8 patch along the base of most of the walls. Not a fun job. Not to mention, the cost of a 8ft run of the baseboard heat (minus the heating element) was $60 or so. We’d need at least 8 of them. No thanks. I guess that means we have to paint… We popped off all the hardware and spread it out to be sanded, primed and painted with metalic rated Rustoleom. Ok, enough with the painting. The baseboards came out nice. Sarah wants them to be glossy. So I have a feeling we’ll be painting them again when that time comes. Right now it’s on to bigger issues.
We got to a point in the project where we were very close to laying the floor down. We always knew there was a slight pitch to the floor. It was very hard to tell when there were rugs in the room. But, with the old hardword exposed you could put an office chair in one corner of the room and it would slowly make its way across the room. Instead of laying down our kickass new floor and have it not be level, I decided to do a little exploratory surgery on the floor.
I cut out a section to see what was going on with the subfloor and floor joists. It wasn’t good news. I could see it was framed with 2x6s. (Sarah dummie edit: They're supposed to be 2x8s.) They looked to run the length of the house, 24 ft. This was quite shocking to Nick and Paul. 2x6 over a 12 ft run would be asking a lot. 24ft would be catastrophic. We found out later that they were 12 footers that met on a beam above the kitchen. Not as bad a first believed. Then I opened up some more of the floor to find out the joists are 24 inches on center. Yikes! If they were 2x8s they should be 16 on center. 2x6s really should not have been used, but if they were, 12 on center might have been a good idea. Don’t get me wrong, it’s old wood and a 2x6 back then was a true 2x6. But we’re starting to find out why there was a bit of bounce in the floor. But it didn’t really explain the pitch.
Out came the rest of the old hardwood and subfloor to expose the beam in the kitchen. The beam was not level either. It was “sinking” towards the middle of the house. Things are starting to make more sense. But why the sag in the beam? The boys headed down to the first floor for some further investigation. Turns out the sag exists there as well. So we’re at the point now where we need to uncover why the sag exists. Is there a post in the basement that is sinking, or bowing? Is the foundation shifting? We could come up with a handful of reason as to what the issue may be. What we need to do is get a professional out to determine if something needs to be done.
A bit of good news is the sag on the first floor has been there as long as I can remember. I could put a tennis ball on the floor and it would slowly roll across. My hopes is the house has just settled and isn’t moving any further, or it won’t get any worse as long as we reinforce some things. My fear is that we have major foundation damages that will need to be repaired to the tune of big bucks. Keep your fingers crossed!
Irregardless (I know it’s not a word), we are moving on with our work, with a plan!
Complete floor demolition in bedrooms upstairs, cleaning up as we go.
Demo the ceiling in the kitchen, dining and bar room below the bedrooms
Add 2x8 16 on center to support the load of the floors upstairs
Level the floors to the landing at the top of the stairs so we don’t need to change the height of the last riser, “step” into each of the rooms.
Lay a new sub floor
Do the baseboard and trim
Lay the wood floor
Let Sarah decorate (Sarah edit: EEEE!!)
This has opened the door to two other projects that were in the pipeline, but way down the pipeline.
Redo the ceilings in the Dining Room and Bar.
Open the wall between the Bar and Living Room
Since we need to tear down the ceiling to add the new 2x8s, that redo of the ceilings will be happening around the same time.
Since we’re going to have the framing exposed in the Bar, it will be an opportune time to open up the wall into the Living Room. So we’re going to try to accomplish that as well.
We’ll be doing all the work upstairs through the month of December. I’m going to do my best to not put my foot through the ceiling as we’re hosting Christmas Eve. Once the holidays are over we’ll get to demo’ing the ceilings downstairs.
Tis the season to be in the middle of a giant remodel!
Welcome Home
To celebrate Tony's return from a family holiday in Florida, guess what we did? If you guessed a romantic night out of wining and dining... you guessed wrong! Last night I lay in bed watching Jon & Kate Plus 8 while Tony was upstairs hammering away at the floors. I had to turn the TV up real loud too, cuz he was making tons of noise. How annoying! (note: Barkley never woke up. Poor lil' deaf dog.)
Saws, hammers, drills, lions, tigers, and bears, oh my! Who knows what the dilly was going on up there. Actually, I do sorta know. He was tearing up the top layer of flooring in upstairs bedroom #2 down to the subfloor so The Boys could get started on leveling out the floor. I think. The good news is that BR#2 is not nearly as pitched as BR#1. So there is some silver lining.
After hours of back-breaking work, Tony made his way down to spend some quality time with me and the dog. And promptly passed out in bed. He works hard, that one. Boy did I miss him.
This weekend - LOTS on the to do list. And I plan on actually contributing to the work, at least a little.
Wednesday, December 3, 2008
Holiday Top Ten
1. Christmas Tree - Thought I'd start with the obvious. Nothing brings holiday cheer and warmth to a home than a beautifully decorated Christmas tree. Truth be told, if it were socially acceptable and practical, I'd keep it year-round.
2. Mosaic Tree - And for a different kind of tree, one of these festive little guys is adding a whole lot of fun and light to our entryway console table. It's my most recent holiday purchase and it will be one of those items I'm excited to pull out every season.
3. Inviting Outdoor Lighting - We're skipping the blinky holiday string lights and updating the basics. We just bought this outdoor light to replace the rusty old one by our front door. It screams, "Come on in, it's warm and cozy in here!"
4. Energy efficient window panels - These will soon be installed in front of the french doors to our deck. They'll provide tons of warmth, both literally and decoratively (is that a word? Whatev). They also make tons of cents when it comes to home heating! (See what a did there? har har)
5. Dunkin Donuts Hazelnut coffee - The holiday season drives me into a flavored coffee frenzy. But too much flavor is just... well, too much. So I add a few scoops of hazelnut to the DD regular blend, and it's just the right amount for my taste buds. It also makes the house smell amazing!
6. Oldies 103.3 - All holiday music, all the time. I put this on when I'm decorating, cleaning, cooking, baking. It really puts me in the mood... the holiday mood, that is. Get your mind outta the gutter, Tonez.
7. Area rugs - In the hopes of having our wood floors done in the near future, we purchased a couple of rugs of West Elm and Crate and Barrel. They're simple, durable, and functional, and they'll break up the big block of brown wood. Unfortunately, they're not going to be of much use to us for a while. Sigh. But we do have some lovely rugs in our entry way and by the french doors. They don't have Santa and his reindeer, but they're definitly seasonal and warm.
8. PAINT - If I never see another roller or paintbrush again, I'll be a happy lady. But I will say that there is no easier or more affordable way to make a difference in any room. We recently painted our front door RED (I have always wanted a red door) and we're working on painting all the trim we can get our hands on bright white. We're going for clean and fresh.
9. Hand-held Mixer - As soon as the air turns cool, all I want to do is bake. This mixer is one of the most frequently used items from our wedding registry. I'm hoping to pick up some new holiday dessert recipes for Christmas parties.
10. Holiday Bowls - We have a million of these. Hosting Christmas Eve with Tony's family has lent itself to accumulating tons of Christmas-themed entertainment ware. My personal favorite place to shop for such items is Homegoods.
This was fun. Feel free to put your spin on a holiday top ten list!
Monday, December 1, 2008
From the past to the present
The big dramatic change was going to be the wood floor... Of course I can't remember the name of the type of wood, but it's dark and the planks are wide (5 inches) and sort of rustic-looking. My dream flooring, basically.
Friday, November 28, 2008
Sarah is Irish afterall...
The Bar
History/Facts
-Before the porch was converted to a sun room, this room was always used as a living room.
-When we started renting the house in 2003 we weren’t using this room for much of anything.
Highlights
-Part of the Bar/Dining/Kitchen open floor-plan
-Has a large deck attached
-Parquet wood floor
-Wired for surround sound and even has a TV mounted (like a real bar!)
-Working bar tap (nothing has been on tap in a while…)
-Large mirror behind bar makes the room feel even bigger.
Lowlights
-Ceiling is dated. Old 12x12 foam tiles.
-No lighting
-Exposed pipes for heat (left over work from deck expansion)
What we've done
-Our former roommate (now "arts and crafts" brother in-law, Nick) built the bar
-Removed two windows and added French doors to lead to the newly constructed deck. This may be the best change we’ve made to the house to date. It makes the house feel so much bigger.
-Painted the walls
-Added some colorful (cheap) lights above the bar
What we'd like to do
-Replace ceiling and add canned lights (8)
-Open the wall up to make a large great room w/ the sun room (10)
Where to begin?
Sun Room
History/Facts:
-Converted in the early 90s from a storm window porch to living space with a tiled entry way, carpet and a large bay window.
-Part of ceiling was replaced as the roof above the room had a leak (roof was also replaced)
-Main entry to the house
Highlights:
-High ceilings
-Large south facing (i.e. Lots of sun) bay window
Lowlights:
-The ceiling that was replaced is painted white, while the rest of the ceiling has a textured finish
-Carpet is beat up from traffic and pets
What we’ve done:
-Painted walls (used to be a fleshy peach)
-Painted the front door red (inside and out) - Still needs a final touch up
-Bought a sweet coffee table on craigslist!
-Bought a 42” LCD TV (every home needs one!)
What we’d like to do:
-Texture the ceiling to match (3)
-Replace carpet with wood floor and area rug (5)
-Open the wall up to make a large great room w/ the bar (10)
Sarah and Tony's Peach Orchard Project
Over the last 6 months we have been moving full steam ahead with projects of all sizes. We've built a list of what we've done to date, and what we'd like to do in the future. We figure this is the best way to attack our blog. I will add a bit of history wherever possible.
So that's it. Welcome to our Peach Orchard Project.