I guess I’ll add my $0.02 from this past weekend. Simply put, the new floor looks great. It was easy to lay, especially since we had 3 of us working on it. The boards were all the same length, but you’d never really notice that unless I told you. But, because they are the same length, it made it easier (ie faster) to layout. I’d say it took 12 hours to install over two days, tops. That’s figuring in the lunch breaks. The payoff is a floor that works perfectly with the wall colors we chose. I can’t wait to see how the light floor looks against the dark stained maple treads on the stairs. We’ll see in a few weeks.
Another big step forward this weekend was electricity! We now have lights in the kitchen and living area. All of the sockets are working as well. They were all replaced with nice new white plugs and white trim. We hung a chandelier in the dining room the day after the electrician left, but it doesn’t work. I’m hoping it’s just not tied in yet. We’ll see when he comes back to finish a few of the switched. The lights in the kitchen and family room are on dimmers. They’re such a modern day convenience that we’ve overlooked for a long time.
There has been a lot of work done on this house in the last 4.5 months. We’ve checked some big items off the list along the way. To see the floor done on the first floor has been one of, if not, the most rewarding. It’s hard to describe, but that’s where we live! Getting the bedrooms done upstairs was great. But that’s sort of our own space. Now that the first floor is live-able again, it’s a space we can share with everyone. It’s exciting! We can’t wait to have a party and have everyone over to scuff up our new floors! Take those shoes off at the door!!!

Monday, April 20, 2009

A new house
Where to start, where to start...
So much has happened in the past couple of weeks, it's hard to sum up in a single entry. So I'll just cover a couple of the major bullet points and then maybe Tony can expand.
1. Paint
My nemesis. From the point of choosing a color, slapping it on, second coats, washing brushes. The whole process makes me both anxious and bored to tears. But after poring over countless swatches, choosing a number of test samples, buying 2 gallons of a paint color I ended up hating, and repeating the process all over again... I think we finally nailed it.
In the main living area we went with a basic taupe/tan/whatever you want to call it. And in the kitchen/dining we went with a blue-gray. Here's a decent picture of how the 2 colors play off eachother:

Check out those moldings, huh? Another recent dramatic update.
And please note the 2 chairs and TV tray that were temporarily acting as "couch" and "coffee table."
Also regarding paint, we had new ceilings, moldings, window trim, etc that all needed to be primed and painted. Luckily Nick and Paul own a sprayer, so after taping everything off, hanging sheets over the kitchen, and donning a dashing gas mask or two (I hid in the bedroom), the whole process probably took 1/4 of the time it would have with standard rollers and brushes. Those boys always come through for us.
And here's the biggest change that happened this weekend:
2. The floors
Because the upstairs floors are so dark and cozy, we wanted some contrast with the downstairs, so we were going with something light and airy. The original natural maple we picked out ended up coming back from the mill defective. So it was back to the drawing board. I had always loved the idea of bamboo, so when the maple didn't work out I floated the idea to Tony again. With Nick's approval, he went for it. It also helped that it was a heck of a lot more affordable. So we chose a light 3 3/4" bamboo for the downstairs living and dining areas, and we could not be happier. CHECK IT OUT!
Laying it down:

Halfway done:

Pretty much there:

I love how you can see the subtle striations of the bamboo.
And here we are set up with our new couch:


The bar will go back where the stools are sitting, and we're in the process of finding an area rug, among other furnishings. But I can't believe the difference in the matter of a single weekend.
Friday night we were on our dusty subfloors watching TV in a wooden chair with TV trays in front of us. Last night we were on our new floors sitting on a couch watching the Amazing Race with Janet and Nick.
Mama said there'd be days like this.
So much has happened in the past couple of weeks, it's hard to sum up in a single entry. So I'll just cover a couple of the major bullet points and then maybe Tony can expand.
1. Paint
My nemesis. From the point of choosing a color, slapping it on, second coats, washing brushes. The whole process makes me both anxious and bored to tears. But after poring over countless swatches, choosing a number of test samples, buying 2 gallons of a paint color I ended up hating, and repeating the process all over again... I think we finally nailed it.
In the main living area we went with a basic taupe/tan/whatever you want to call it. And in the kitchen/dining we went with a blue-gray. Here's a decent picture of how the 2 colors play off eachother:

Check out those moldings, huh? Another recent dramatic update.
And please note the 2 chairs and TV tray that were temporarily acting as "couch" and "coffee table."
Also regarding paint, we had new ceilings, moldings, window trim, etc that all needed to be primed and painted. Luckily Nick and Paul own a sprayer, so after taping everything off, hanging sheets over the kitchen, and donning a dashing gas mask or two (I hid in the bedroom), the whole process probably took 1/4 of the time it would have with standard rollers and brushes. Those boys always come through for us.
And here's the biggest change that happened this weekend:
2. The floors
Because the upstairs floors are so dark and cozy, we wanted some contrast with the downstairs, so we were going with something light and airy. The original natural maple we picked out ended up coming back from the mill defective. So it was back to the drawing board. I had always loved the idea of bamboo, so when the maple didn't work out I floated the idea to Tony again. With Nick's approval, he went for it. It also helped that it was a heck of a lot more affordable. So we chose a light 3 3/4" bamboo for the downstairs living and dining areas, and we could not be happier. CHECK IT OUT!
Laying it down:

Halfway done:

Pretty much there:

I love how you can see the subtle striations of the bamboo.
And here we are set up with our new couch:


The bar will go back where the stools are sitting, and we're in the process of finding an area rug, among other furnishings. But I can't believe the difference in the matter of a single weekend.
Friday night we were on our dusty subfloors watching TV in a wooden chair with TV trays in front of us. Last night we were on our new floors sitting on a couch watching the Amazing Race with Janet and Nick.
Mama said there'd be days like this.
Friday, April 10, 2009
Before and After
I spent a little time w/ Google SketchUp and rendered these 3d drawings of the first floor layout. It's not to scale, but it's pretty close.


Bigest differences:
We're in the home stretch. Can you feel it? We're waiting on our first floor flooring to arrive. We order a 4 1/4 inch maple. It has a natural grain to it so it should be a good mix of light and dark pieces.
All of the crown molding is up, primed and painted with 2 coats of Ultra White. The walls and ceilings have both been primed. The ceilings have been painted white, and one set of walls has their first coat of paint. We've been dreading the painting stage, but it has been painless through this point. The boys have a paint sprayer that made it super easy. It took about an hour and fifteen minutes to prime all of the walls, trim, and celing with the sprayer. We're talking almost 800 sq feet of ceiling and who knows how much wall space. This would have been an all day job to do manually.
Once we figured out how to clean the machine and reset it, it took about 20 minutes to do each coat of Ultra White on the crown, window trim and doors. Just goes to show how valuable Nick+Paul are to have as friends.
We celebrated our success last night with a grill fest of BBQ chicken and sausages on a make shift plywood table!
One note: We had our first real casualty of the project. Nick+Paul had to take the french doors out of the bar while leveling the floor. The set it out on the deck and continued working. They heard a big crash and couldn't figure out what it was. Apparently the doors blew over and half of the glash was smashed! Nobody was hurt but as the supervisor of the job, I had to take it out of both of their paychecks. They understood and each drank one less beer that night.
Before

After

Bigest differences:
- No wall separating the front room and living room.
- The wall on your left hand side when you walk in the house is now smaller, making the opening bigger
- The wall behind the bar (that used to have a mirror on it) was removed
Kitchen island is gone - A new wall blocking the back bedroom from the bar area
We're in the home stretch. Can you feel it? We're waiting on our first floor flooring to arrive. We order a 4 1/4 inch maple. It has a natural grain to it so it should be a good mix of light and dark pieces.
All of the crown molding is up, primed and painted with 2 coats of Ultra White. The walls and ceilings have both been primed. The ceilings have been painted white, and one set of walls has their first coat of paint. We've been dreading the painting stage, but it has been painless through this point. The boys have a paint sprayer that made it super easy. It took about an hour and fifteen minutes to prime all of the walls, trim, and celing with the sprayer. We're talking almost 800 sq feet of ceiling and who knows how much wall space. This would have been an all day job to do manually.
Once we figured out how to clean the machine and reset it, it took about 20 minutes to do each coat of Ultra White on the crown, window trim and doors. Just goes to show how valuable Nick+Paul are to have as friends.
We celebrated our success last night with a grill fest of BBQ chicken and sausages on a make shift plywood table!
One note: We had our first real casualty of the project. Nick+Paul had to take the french doors out of the bar while leveling the floor. The set it out on the deck and continued working. They heard a big crash and couldn't figure out what it was. Apparently the doors blew over and half of the glash was smashed! Nobody was hurt but as the supervisor of the job, I had to take it out of both of their paychecks. They understood and each drank one less beer that night.
Monday, March 30, 2009
A Tale of Two Closets
As BIG things continue to happen throughout the house, I thought I'd highlight a couple of the little things (comparitively) that have happened... Our closets.
As far as closets go, I have been spoiled. A few years back Tony broke through the wall of our bedroom to create a doorway into the adjacent space. A room that was previously used as an office/teeny-bedroom was transformed into the walk-in closet of my dreams. Both our dressers and all of our clothes, shoes, bags, etc. fit perfectly on their respective hook, hanger, or shelf.
My one regret is never taking a proper photo of that closet. It was impressive. Those who were lucky enough to witness the beauty can attest.
I have never considered myself an overly organized person, but this closet sparked something in me. Shoes were organized by occasion, heel height, then color. Shirts all had to face a certain direction, sweaters and jeans folded just so. And not just for my side (okay, my 3/4), but Tony's too. He was not always the best at keeping up with my rules, but it doesn't bother me. This boy used to grab single socks out of his drawer in the dark and hope they matched. I can't expect him to keep all his hangers facing inward and shirts buttoned down to the 3rd button.
With the reconfiguration of the upstairs, we built a new closet in each room. Tony would take the master closet, and I would take the bigger one in the office. It's not that I have a lot of stuff... okay, I do... But I swear, Tony would still be clinging to the flannel shirts and band tees of the 90's if I didn't buy him a few sweaters for his birthday every year. His closet needs are minimal.
We got rid of the old closet prior to building the new ones, so we were in limbo for a little while there. I had my dresser in the bedroom, Tony's was in the dining room. The rest of our clothes and shoes were in laundry baskets and trash bags. Not the best situation.
When the new closets were finally done, I went to town getting all my stuff in there. It was such a relief. These photos were taken soon after I had organized everything. There's more stuff in there now, but this gives you a good idea...
Color-coded tops, necklaces on a hook to the left:

Bags:

Dresses, jackets, pants:

Jeans, etc. up top, sweaters below:

And the shoes:

Tony custom built the shoe shelves. Cool, right? They were meant to be painted white to go with the trim, but at that point I was just grateful to have a spot for them.
And here's Tony's closet:

As far as closets go, I have been spoiled. A few years back Tony broke through the wall of our bedroom to create a doorway into the adjacent space. A room that was previously used as an office/teeny-bedroom was transformed into the walk-in closet of my dreams. Both our dressers and all of our clothes, shoes, bags, etc. fit perfectly on their respective hook, hanger, or shelf.
My one regret is never taking a proper photo of that closet. It was impressive. Those who were lucky enough to witness the beauty can attest.
I have never considered myself an overly organized person, but this closet sparked something in me. Shoes were organized by occasion, heel height, then color. Shirts all had to face a certain direction, sweaters and jeans folded just so. And not just for my side (okay, my 3/4), but Tony's too. He was not always the best at keeping up with my rules, but it doesn't bother me. This boy used to grab single socks out of his drawer in the dark and hope they matched. I can't expect him to keep all his hangers facing inward and shirts buttoned down to the 3rd button.
With the reconfiguration of the upstairs, we built a new closet in each room. Tony would take the master closet, and I would take the bigger one in the office. It's not that I have a lot of stuff... okay, I do... But I swear, Tony would still be clinging to the flannel shirts and band tees of the 90's if I didn't buy him a few sweaters for his birthday every year. His closet needs are minimal.
We got rid of the old closet prior to building the new ones, so we were in limbo for a little while there. I had my dresser in the bedroom, Tony's was in the dining room. The rest of our clothes and shoes were in laundry baskets and trash bags. Not the best situation.
When the new closets were finally done, I went to town getting all my stuff in there. It was such a relief. These photos were taken soon after I had organized everything. There's more stuff in there now, but this gives you a good idea...
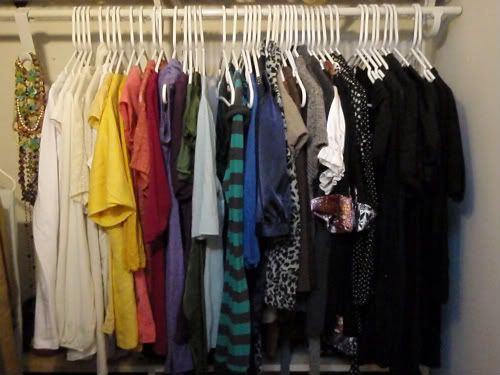
Color-coded tops, necklaces on a hook to the left:
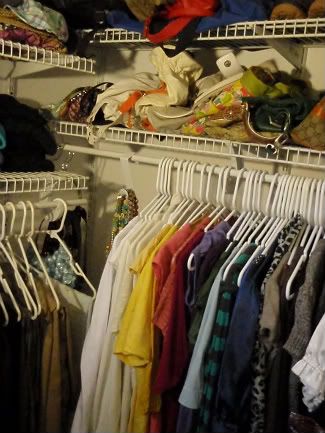
Bags:
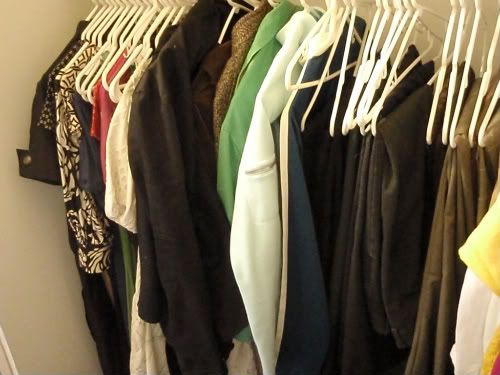
Dresses, jackets, pants:
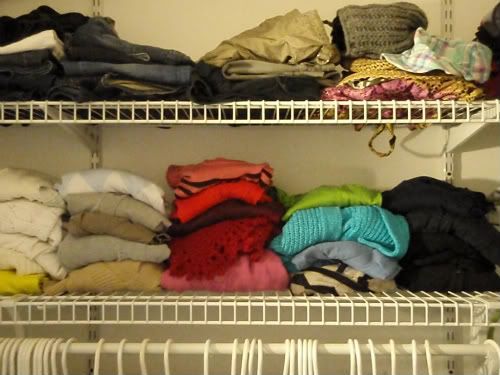
Jeans, etc. up top, sweaters below:
And the shoes:
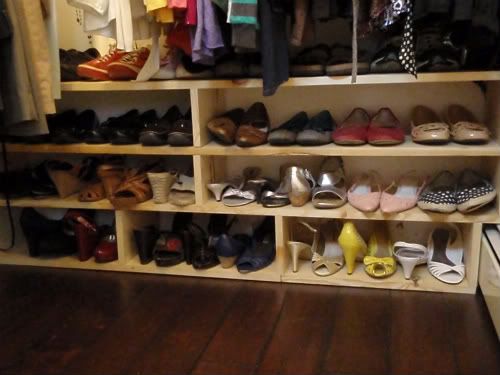
Tony custom built the shoe shelves. Cool, right? They were meant to be painted white to go with the trim, but at that point I was just grateful to have a spot for them.
And here's Tony's closet:
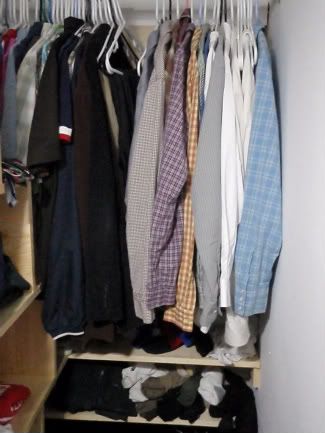
Yawn.
Quite a shoe wardrobe, eh?
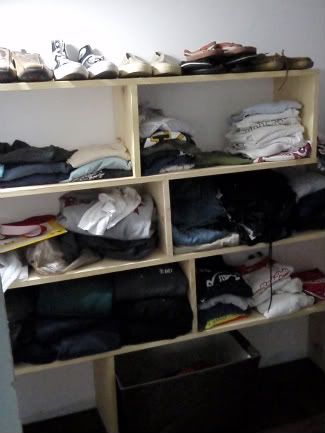
He built all the shelves in his closet too. Tony was able to completely get rid of his dresser, so his entire wardrobe fits into this space. And he still has room to spare.
To close, here is Neely hanging out in his new favorite spot... My dirty laundry basket:

Saturday, March 28, 2009
The progress continues

As I type this we have 2 irishmen plastering our walls and ceilings on the first floor. That's right folks, walls AND ceilings. Here is one of their stands with a bunch of muddy plaster on it...

Over the past two days, and the last week in general, we've taken some huge steps. The Choice Woodworking boys finished all of the trim upstairs. This included installing the doors, baseboard and casing around the windows. Sarah and I painted all the trim "Ultra White." It looks great against the dark floor.

Remember the nightmare of a baseboard heating situation in the bedroom?

I'd say it looks a little better now!

I cleaned up the soon to be bedroom and set up a temporary lounge area. This is the Crate and Barrel couch that we bought off of Craigslist.

Our office is a mess right now consisting of the unbuilt bed and tape on the floor from painting the trim. We had to turn our focus to the downstairs as the plaster guys were coming on Friday to hang the blue-board.
Nick and Paul finished some touch ups to the framing. They "blocked out" an area to mount a TV to the wall. We also layed out exactly where all of our in-ceiling and in-wall speakers will go. Note that we have a 42" TV right now, but I conventienty layed out the in-wall speakers so we could mount at least a 60" without any issues :-)


Here you can see how the wires run through the wall to the back of where the TV will be. No cables will be seen!

The hanging of the board went surprisingly quick with just two guys working on it. They were very Irish! We just kept pouring Guinness down their throats as it seemed to make them work faster.

That's not a circus clown. It's an Irishman on stilts.
Until next time!
Monday, March 16, 2009
Tony is a rockstar
The floors are done upstairs.

Don't mind the temporary pads under the feet of the desk.
This will also be our guest room, otherwise known as "Chad's room." Here's Chad's bed.


I still haven't decided if this rug works in here. It might be banished to the dining room. But we'll see once we get some other stuff in there.

Looking across the hall to the office.

Do you mind if I say that one more time? Okay, here I go...
THE FLOORS ARE DONE UPSTAIRS.
Thanks. That felt too good to say just once.
And my rockstar husband did it all with his own two hands. And one very sore back. He researched everything, he bought the proper tools, and then he, as they say, 'got her done.' Little by little, row by row, Tony lay the dark wood planks over the level subflooring. (It might take me a while to stop stressing the 'level' part.) He spent weekends and weeknights working, when he could have been doing a million other much more enjoyable things I'm sure. And now the project that started it all is finally complete.
SAP ALERT: I realize how lucky I am to have a man in my life who takes the initiative to do these kinds of projects, as my mom loves to remind me (Hi Mom!). To do them well and to do them right. And when he doesn't know something, he gets someone else to do it, without being all, "Me man. Me strong and me know all! Grunt." Ya know?
He's a real good cuddler too. Teehee. Blush. Boof. /END SAP.
Anyway, we were so excited that the floors were done, we rolled out the area rugs we bought months ago and started to get the office set up. Now Tony has a place other than the kitchen island to do his school work.
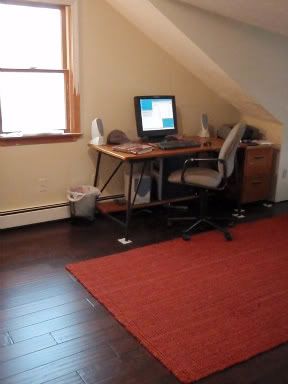
Don't mind the temporary pads under the feet of the desk.
Desk and file cabinet are Craigslist finds... More on those in a future entry.
This will also be our guest room, otherwise known as "Chad's room." Here's Chad's bed.
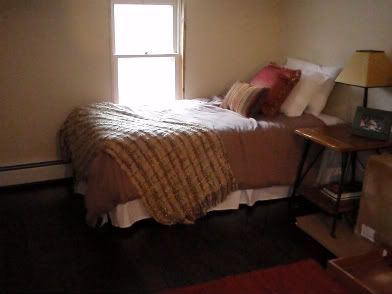
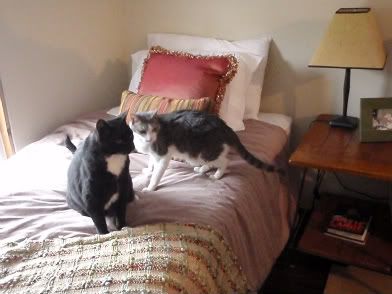
Loki and Neely will keep it warm for him while he's on his New Zealand adventure.
I didn't take any pictures of the wall to the right, because it's covered with boxes. The boxes contain our new bed for the master which we bought back in November and have yet to set up... For obvious reasons.
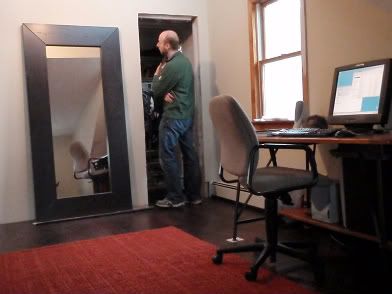
Tony's standing in front of my closet here. The closets are another entry for another time. Lots to say about those. All good things, I assure you.
Master:
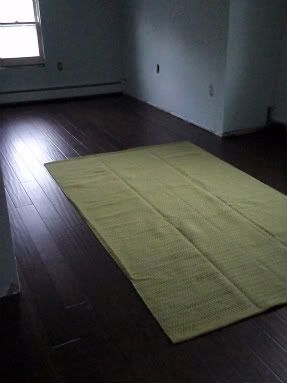
I still haven't decided if this rug works in here. It might be banished to the dining room. But we'll see once we get some other stuff in there.
Looking across the hall to the office.
The boys still have to finish up all the trim work and put in some doors. We have to get new socket covers, window treatments, light fixtures, etc. etc. But I'm just so excited to have another room in which to hang out, words can't express.

Here's me in my 'commuter shoes', happy as can be. :-)
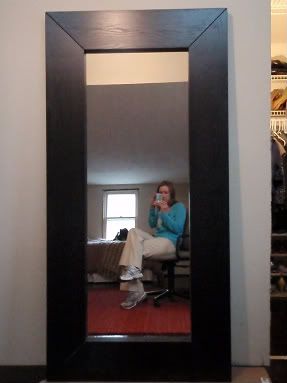
Here's me in my 'commuter shoes', happy as can be. :-)
Monday, March 2, 2009
One down…
…I don’t know how many to go. It’s just nice to see something DONE. Ok, it’s not 100% done. The only pieces missing are the closet door and the trim work. But the floor is DONE. The closet is DONE (Sarah may decide to paint the shelves…) The 2nd bedroom is now live-able space! We’ve just doubled the amount of rooms we can now live out of!
So with the big announcement out of the way, here’s how it all went down.
As you may already know, this started out as a project to lay hardwood floors upstairs. When we discovered how out of level those floors were, we knew we had a long road ahead of us. Here’s a shot of the new level subfloor. We leveled it to the top of the stairwell, out side of this bedroom. Here is the far wall. Check out where the original floor (and heat) was compared to the new floor. If you can’t tell, that’s around a 6” difference over a span of 14 feet. Yowzers.
So with the big announcement out of the way, here’s how it all went down.
As you may already know, this started out as a project to lay hardwood floors upstairs. When we discovered how out of level those floors were, we knew we had a long road ahead of us. Here’s a shot of the new level subfloor. We leveled it to the top of the stairwell, out side of this bedroom. Here is the far wall. Check out where the original floor (and heat) was compared to the new floor. If you can’t tell, that’s around a 6” difference over a span of 14 feet. Yowzers.


With Nick and Paul only available on Sundays, I had to try to do as much on my own to keep the job moving. At times it’s really tough. Working a full day, just to come home and work isn’t always the most ideal day. But, if we ever want this project to end, that’s the way it has to be.
I started by replacing all of the heating registers upstairs. Way back when we painted the old ones. But they didn’t POP enough, and they were pretty dinged up. We (I?) made the decision to replace them all. Now they POP.
What’s that you see in the photo above? Is that the new floor?! Well, kinda. I just put down a few pieces to see how it would look against the new heaters. Pretty good! (Dusty, I know)
I started by replacing all of the heating registers upstairs. Way back when we painted the old ones. But they didn’t POP enough, and they were pretty dinged up. We (I?) made the decision to replace them all. Now they POP.
What’s that you see in the photo above? Is that the new floor?! Well, kinda. I just put down a few pieces to see how it would look against the new heaters. Pretty good! (Dusty, I know)

So I finished up the heat and moved forward with Sarah’s closet. The large closet is in the smaller bedroom. Kind of a screwy layout, but it will work out fine as it’s right next to the bathroom. So Sarah can just walk out of the bathroom and grab a days worth of clothes right next door, come back to the bedroom and say goodbye to me while I am still sleeping, as she heads off to work. I installed all of the hardware (which was recycled from the closet down stairs) to get an idea of what I would have left over for my closet. My closet will be the small closet in the big bedroom.

I figured the closet would be a good place to “practice” nailing in the wood floor. Nailing, stapling, whatever you want to call it. After much searching, I decided to purchase a flooring stapler. There were a few things at work here. The cost (not cheap) of buying vs. renting. A rental runs around 30-35 a day. With me only able to work nights and weekends, I’d feel rushed trying to bang the floor out with a rental eating away at my wallet. I’d have to do the two rooms upstairs, 500 sq feet, as soon as possible. Not the most desirable situation. So I went the purchase route. It was around $400, but it will pay off long term as I’m on my own schedule. I can also use it to do the downstairs (around 700 sq ft) when we get there in a few months…(I hope).
So I did the floor in the closet, and I was feeling quite good about the results. It’s really hard to photograph a closet, but you get the idea.
With my confidence at an all time high (I only wrecked one piece!) I had high hopes when I made the move to the bedroom. Out of all the projects I’ve worked on, I have to say, I am most proud of this one. Building the shed last year with my dad was a big one, but seeing how this floor came out makes me smile big time! It looks great! Of course if it falls apart in a few weeks that will be another story. I got a few tips from Nick, did some serious reading up on the interweb and had at it. I started around 10am on Saturday. I worked until 1pm as I had a birthday party to attend. The whole time I am thinking…I gotta finish the floor!
So I did the floor in the closet, and I was feeling quite good about the results. It’s really hard to photograph a closet, but you get the idea.
With my confidence at an all time high (I only wrecked one piece!) I had high hopes when I made the move to the bedroom. Out of all the projects I’ve worked on, I have to say, I am most proud of this one. Building the shed last year with my dad was a big one, but seeing how this floor came out makes me smile big time! It looks great! Of course if it falls apart in a few weeks that will be another story. I got a few tips from Nick, did some serious reading up on the interweb and had at it. I started around 10am on Saturday. I worked until 1pm as I had a birthday party to attend. The whole time I am thinking…I gotta finish the floor!


I got about 80% of it done. I had to stop in front of the closet as I wasn’t sure what I wanted to do around the threshold. With Nick and Paul coming in the morning, I knew they’d shed some light on it. Well, they did, and with a scheduled day off on Monday, I knew I could finish it. Yes, it looks awesome!


Sarah is currently moving into her closet as I type this. Although we can’t seem to find one bag of clothes… As I just finished typing that she shouted “Never mind, I found it!).
And of course a closet would be nothing without a place to put 100 pairs of shoes. I built, yes I…BUILT, a custom set of shelves that fit around the heating register in the closet. The compressor that I bought for the flooring stapler came with a finish gun, brad nailer and finish stapler. All tools that will let me be a little more handy around the house. I bought 4 – 8’ long 12” wide pine boards and was able to drive them home in our Xterra. Gotta love it!
And of course a closet would be nothing without a place to put 100 pairs of shoes. I built, yes I…BUILT, a custom set of shelves that fit around the heating register in the closet. The compressor that I bought for the flooring stapler came with a finish gun, brad nailer and finish stapler. All tools that will let me be a little more handy around the house. I bought 4 – 8’ long 12” wide pine boards and was able to drive them home in our Xterra. Gotta love it!

I originally only built the top part and was going to mount it to the wall. I then figured out it would be easier to build the base, and it would have some functionality as well.


We ended up testing it out and the top shelf was kinda in the way, so I cut of the top. So it fits a little better now w/ the clothes.
So some progress upstairs, but what about that mess downstairs? Progress there as well! Nick and Paul spent Sunday morning framing out the ceiling for the front room and hanging all of the strapping. It looks so much better having the ceiling lowered in the front room. It makes everything feel bigger.
So some progress upstairs, but what about that mess downstairs? Progress there as well! Nick and Paul spent Sunday morning framing out the ceiling for the front room and hanging all of the strapping. It looks so much better having the ceiling lowered in the front room. It makes everything feel bigger.


I have a little homework to do (demo some wall board) but the place is now ready for the electrician. He’ll be coming on Saturday to get the place wired up. Our lights have been ordered and I’ll be picking them up some time this week.
After the electrician is done the plasterer can get in here. They’ll spend a day hanging the board and plastering the ceiling. Then they’ll come back and do a few of the walls the next day.
If all goes well, we’ll have a ceiling and all of our walls up in the next two weeks!
After the electrician is done the plasterer can get in here. They’ll spend a day hanging the board and plastering the ceiling. Then they’ll come back and do a few of the walls the next day.
If all goes well, we’ll have a ceiling and all of our walls up in the next two weeks!
Subscribe to:
Posts (Atom)

